The Mt Kinabalu Terrain Coaster is the catalog piece that gets the most "how did you make this?" emails, so here's the actual answer. It starts with publicly-available satellite elevation data, ends with a 100 mm coaster you can rest a glass on, and takes about three working days from filament-on-bed to ready-to-ship.
This is a process note, not a tutorial. The goal is to show what goes into one specific catalog item — the kind of detail that's invisible from the product page but matters to the kind of customer who reads behind-the-design.
The data
The source is SRTM (Shuttle Radar Topography Mission), a NASA dataset from a 2000 Space Shuttle mission that mapped most of the world's land between 60°N and 56°S at roughly 30 m horizontal resolution. It's the same dataset behind every "topographic map" feature in mainstream GIS tools, and it's free.
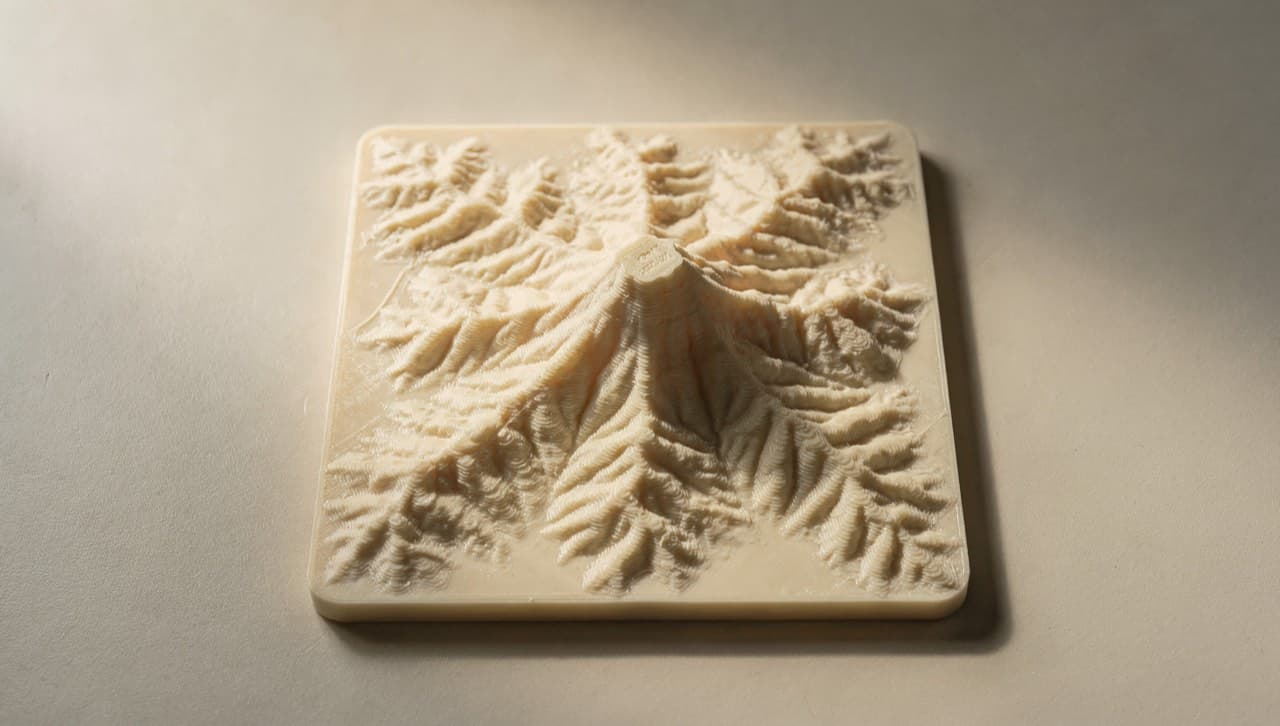
For Mt Kinabalu we crop a 25 km × 25 km square centred on the summit (6.075° N, 116.558° E), which is enough to capture the main peak, Low's Peak ridge, and a hint of the valley below. The crop comes out as a 833 × 833 pixel greyscale image where each pixel value is the elevation in metres above sea level — sea level is black, the 4,095 m summit is white.
The conversion
From there, the path to a printable model is a small Python script we wrote once and have re-used for every terrain coaster since:
- Read the SRTM tile as a NumPy array. Coastline-clipped to the mainland.
- Downsample the 833 × 833 grid to 200 × 200. The lower resolution is what makes the final print read as "topographic" rather than "noisy." 30 m horizontal resolution would print as a chaotic mess at coaster scale; downsampling smooths it without losing the dominant features.
- Apply a vertical exaggeration of ×3. Without it, Mt Kinabalu at 4,095 m printed at 1:1 over a 100 mm × 100 mm coaster would only be 0.32 mm tall — invisible. With ×3 it's 0.96 mm, which is the right amount of relief: you can feel it with a finger but a glass still sits flat.
- Generate an STL using
numpy-stl, treating each (x, y) pair as a height-field vertex. Add a 4 mm flat base under the terrain so the coaster has structure. - Add a chamfered rim at the coaster edge — 1 mm × 45° — so the coaster doesn't catch on tablecloths.
The whole script runs in about 90 seconds end to end. Add a different lat/lon pair and you get a coaster of a different mountain. (We've made one for Gunung Tahan and one for Penang Hill for a private commission.)
The orientation question
The print orientation decision took three tries to get right. Three options:
- Flat, terrain side up. The most obvious choice. Result: the layer lines run horizontally, which makes the relief read as a series of stacked rings — fine for an abstract piece, wrong for a topographic feature where the rings fight the contour lines you're trying to render.
- Flat, terrain side down (against the bed). Better-looking top surface because it prints as a single continuous closing layer. But the underside (the show surface) gets the print-bed texture, which is not what you want on a $35 catalog item.
- Standing up on the edge, with the terrain at 90°. Layer lines run vertically when the coaster is on the table. The terrain renders cleanly. The flat base becomes the side wall during printing. This is what we do.
Print orientation matters more on this part than on almost anything else in the catalog because the customer is looking at the show surface and expecting it to feel topographic. Anything that distracts from that read is a failure.
The finish
Out of the printer, the coaster is matte PLA with visible layer lines on the side wall (acceptable; it's the side) and a clean terrain surface (the whole point). We do two finish passes:
- A light sand on the side wall with 400-grit sandpaper to knock down any printing artefacts at the layer transitions. About 30 seconds per coaster.
- A coat of food-safe matte sealer on the terrain side. This isn't because the coaster touches food — it's because the sealer protects the PLA from condensation rings if a cold glass sits on it for an hour. PLA is hydrophobic enough that it usually doesn't matter; the sealer just makes "usually" a little stronger.
Total handling time per coaster, after the print: roughly four minutes.
Why a coaster
The honest answer is that a coaster was the smallest physical object we could think of that did justice to a 4,095 m mountain. A wall-mount relief is more impressive but harder to ship from KL. A keychain is too small to read the terrain. A coaster sits at the edge of useful and decorative — useful enough that it earns its place on a table; decorative enough that the topography is the reason it's there.
Mt Kinabalu is the first one. There's a list of next-up mountains we'd like to do: Gunung Mulu, Gunung Stong, and a few SEA peaks that punch above their reputation. If there's a specific mountain or terrain feature you want as a coaster, that's exactly what the custom-quote form is for — send the lat/lon and we'll quote it.